
Designing a Paisley Pattern Using Watercolor Marks
In this blog we’ll cover what a paisley design is, the Spoonflower challenge details that inspired this pattern, mark-making in watercolor, building motifs, and building the final pattern. I cannot wait to hear what you think!
History of Paisley Pattern
According to this article by Lindsay Baker for the BBC:
From its ancient Persian and Indian origins with its hidden messages and mysterious symbolism, the iconic motif has had quite a journey. The paisley pattern has travelled the silk routes from East to West, adorned the bandanas of cowboys and bikers, been adopted by the 19th Century boho set, been popularised by The Beatles, ushered in the hippy era and became an emblem of rock ‘n’ roll swagger and swank.
At its most simplest description, paisley patterns utilize teardrop or raindrop shapes, curved lines, fans, swirls, flowers, and stars to create very complex and often abstract designs. They can be muted and simple or complex and even garish in their color palettes.
If I am being honest, paisley is not my vibe at all. I do not own anything that is paisley and to me the patterns often feel chaotic. However, while it may not be my favorite design choice, 2025 is a year for experimentation and courage and so when Spoonflower announced novelty paisley as a design challenge, I thought that at least I could learn something.
Challenge Details: Throw it back to the ‘90s to revive traditional paisley prints into something fresh and inspired. This week’s Design Challenge theme is Novelty Paisley. Paisley is known for its teardrop or abstract almond shape with intricate details. Reimagine this beloved pattern to breathe new life into its classic shape, blending it with novelty elements and playful concepts. Use the original shape as a starting point to create something unexpected. Now’s your chance to explore textures, lines, color palettes and a mix of motifs that would look precious on fabric.
Choosing a Design Medium

Watercolor marks.
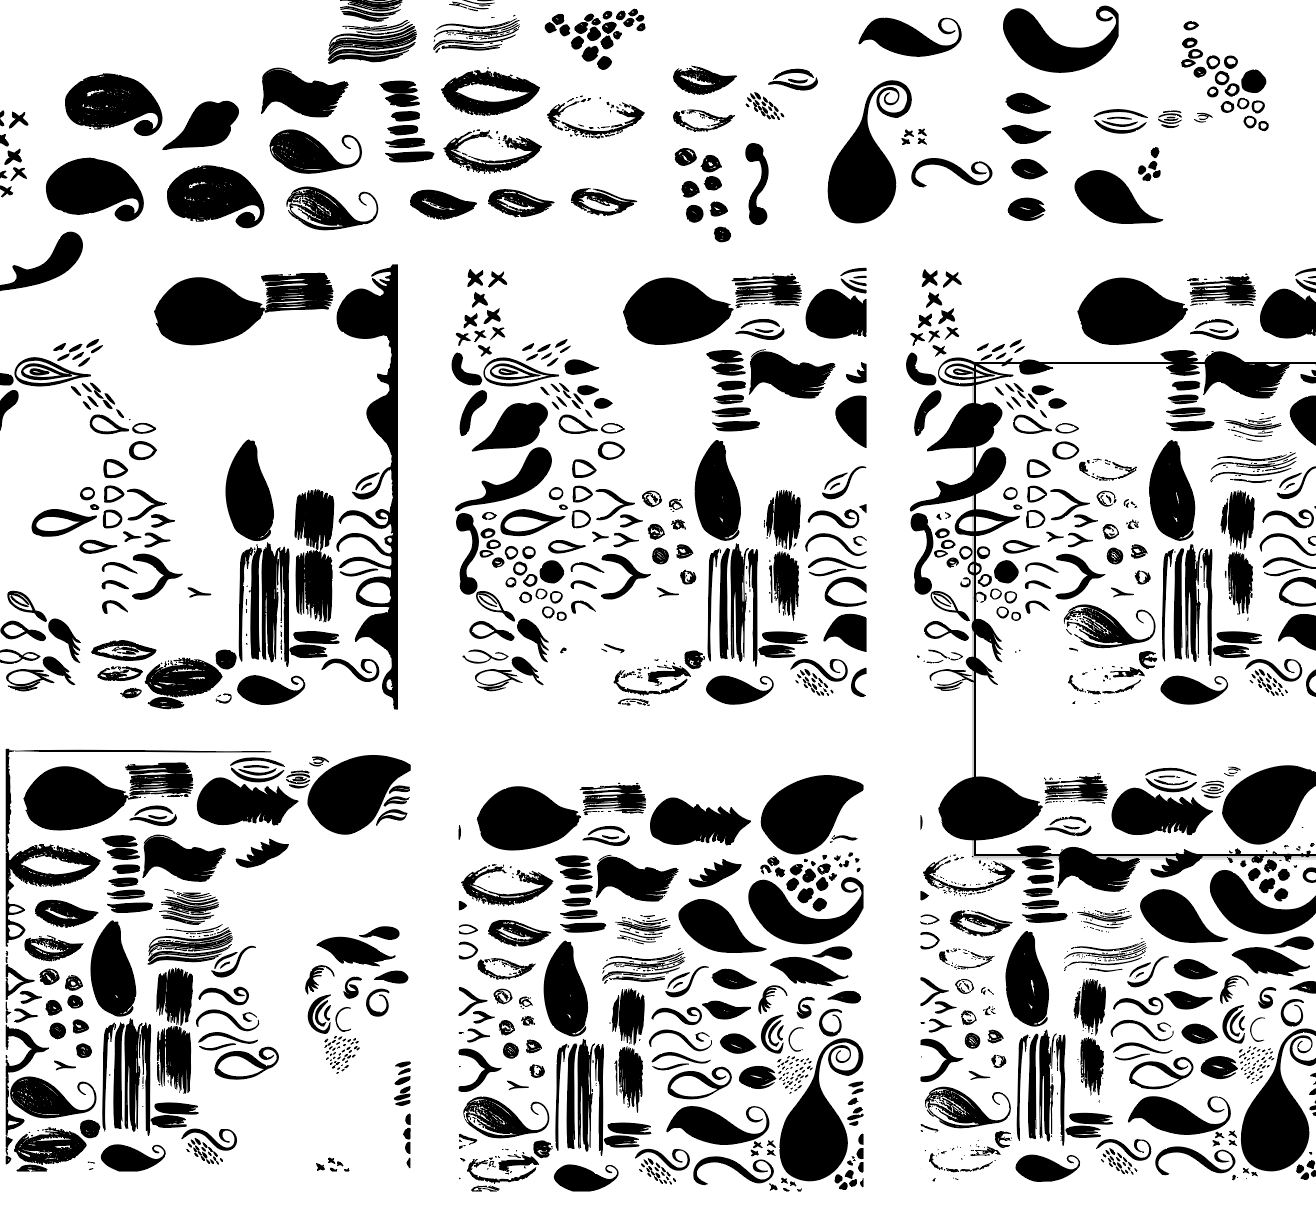
For my paisley pattern, I decided that I would create the pattern using watercolor marks. I had just recently taken an online lesson on using watercolor in design work from Colleen Underwood as part of the membership I belong to, Flourish. I thought that this would be a great way to experiment with the watercolor process that Collen taught. I set aside a little bit of time and created a page full of simple watercolor marks using my gansai tambi watercolors. I tried to capture complete shapes, textures, and smaller design elements that I could use as accents in my pattern. I limited myself to just one page of markmaking, which took about 45 minutes to complete.
Scanning and Vectorizing
Scanning was a simple process, but once I got the scan into Illustrator, I experimented with different settings to see what effects I could make using the same scan. I still find watercolor to be challenging to translate into vectors, but Colleen had some good tips for how to use one scan in different ways. I wanted to use the watercolor marks as solid shapes, but I also wanted to preserve some of the organic textures and shapes that can be unique to watercolor and using a brush.

Scans.
Vectorized motifs.
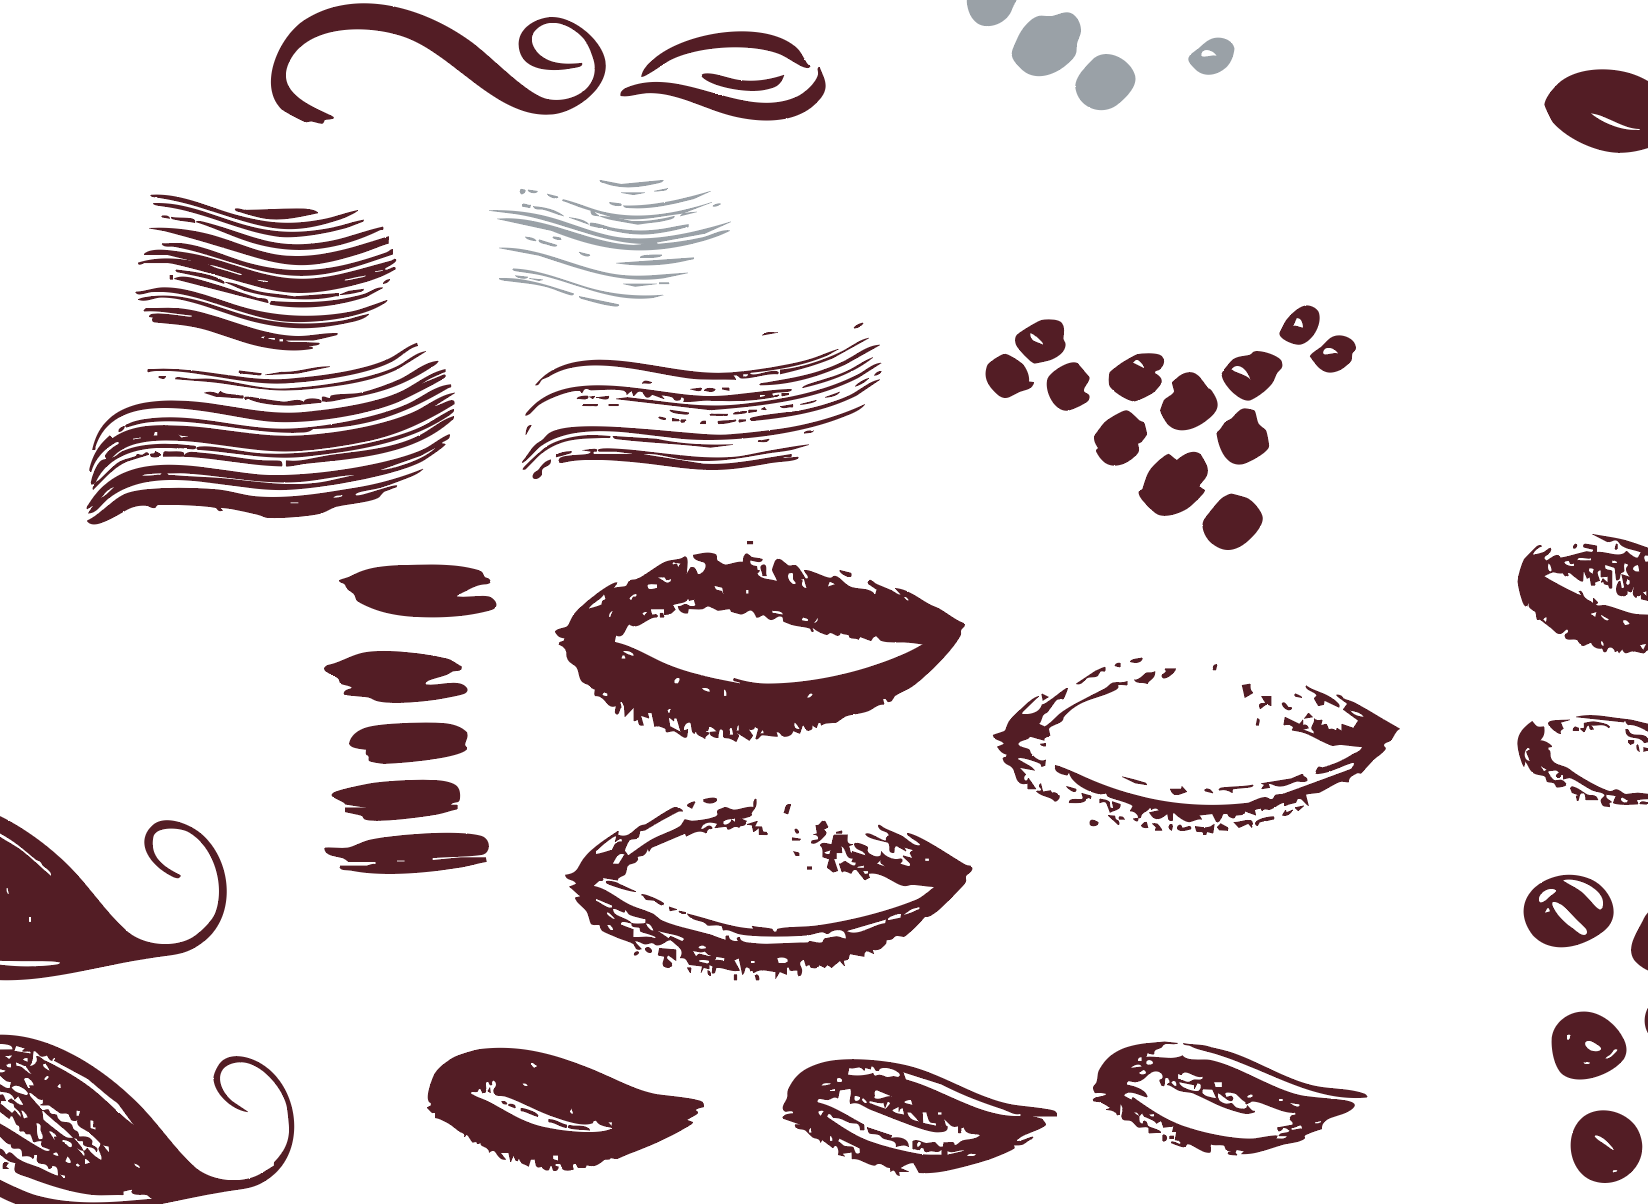
Adding color.
Creating Motifs
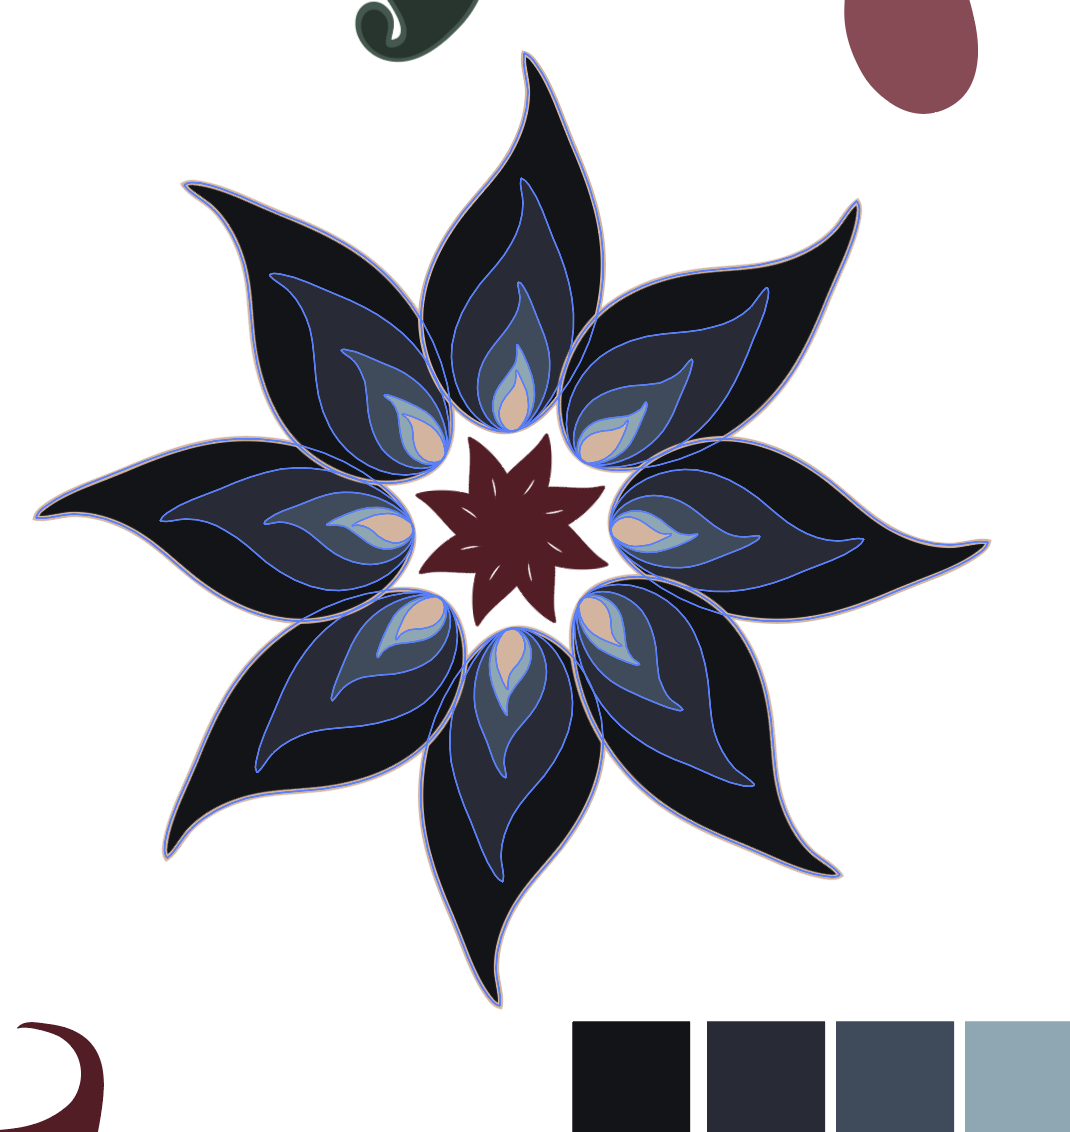
With my basic shapes created in Illustrator, now it was time for the fun part. Before I started building the actual pattern, I wanted to put together a bunch of different motifs (design elements) so that I had a variety to work with. Paisley is known for having lots of layers and lots of details, so I spent a lot of time building out flowers, teardrops, textures, and lots of smaller shapes, like circles and dots. Many of them made it into the final pattern, but many of them did not. The one tool that I used the most for this project was something called a radial repeat. This means that you can choose one element, say a petal, and you can tell the program to repeat it in a circle as many times as you want. I used this technique to create all of the different star-like motifs in this pattern.


Enjoying this read? Join my newsletter list and never miss an update!
Building the Pattern
Building this pattern was hard. I personally like simplicity and balance when it comes to patterns, but paisley is usually the opposite of that. At times it was hard for me to lean into the complexity of it and embrace things not being symmetrical and ordered. I decided to work in a 12 x 12 inch block for my pattern and to design from the center out. I thought that my blue flower was the best motif and decided to make that my centerpiece. I went through more than a dozen different versions and more than once I could not decide whether I liked the pattern or if it was completely hideous. It was one of those things where it was either interesting or terrible, not somewhere in between. I was also amazed at how much a small change could throw off the entire pattern. At one point, I decided to color in the center of one of the flower elements rather than leave it transparent, suddenly it was like there were little eyeballs all over the pattern. (In case you were wondering, the eyeballs were not good.) I would work on the pattern for a couple hours, then walk away and come back later, and still have no idea whether the changes I made improved the pattern or just made it different. Eventually, we got to something that finally felt good enough to submit. I took a couple days off and came back at it with fresh eyes and made final tweaks.
Refinement
This is the most technical pattern I have ever created using individual motifs that had lots of layers. It was really important to spend time away from the pattern in order to notice errors that I wanted to fix. For example, the blue flower in the center of the pattern at first glance looked fine, but eventually I noticed that because of the way each petal of the flower repeated, the layering was inconsistent and needed to be fixed. In this pattern, there were also lots of motifs where you could see through them. In some areas, I liked this layered effect. In other areas, it seemed messy and distracting. Even minor tweaks could have a big effect on the overall feel of the pattern.
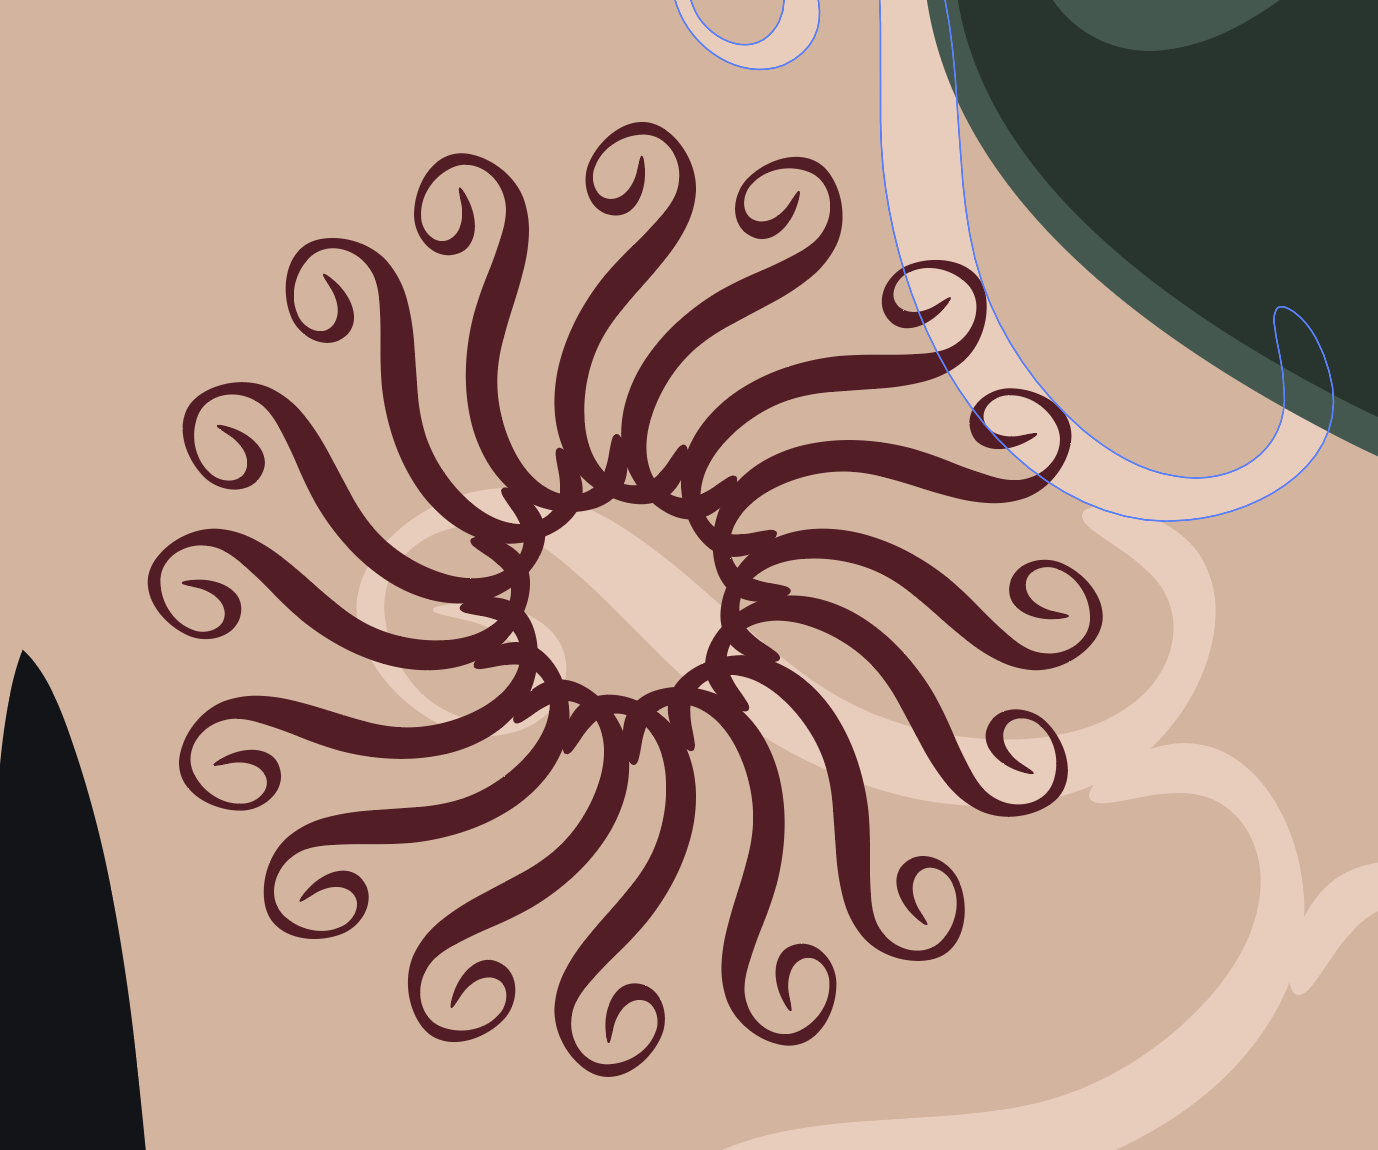
Transparent motif.

Motif where I made sure there was a solid center.
Final Product
This was the most difficult Spoonflower challenge I have participated in this year and even though paisley is not my pattern of choice, I learned a lot about how to build a technical pattern in the process. I also successfully turned simple watercolor marks into a pattern, something that I will definitely be trying again. I also think that I would like to build a paisley pattern using only Illustrator tools.
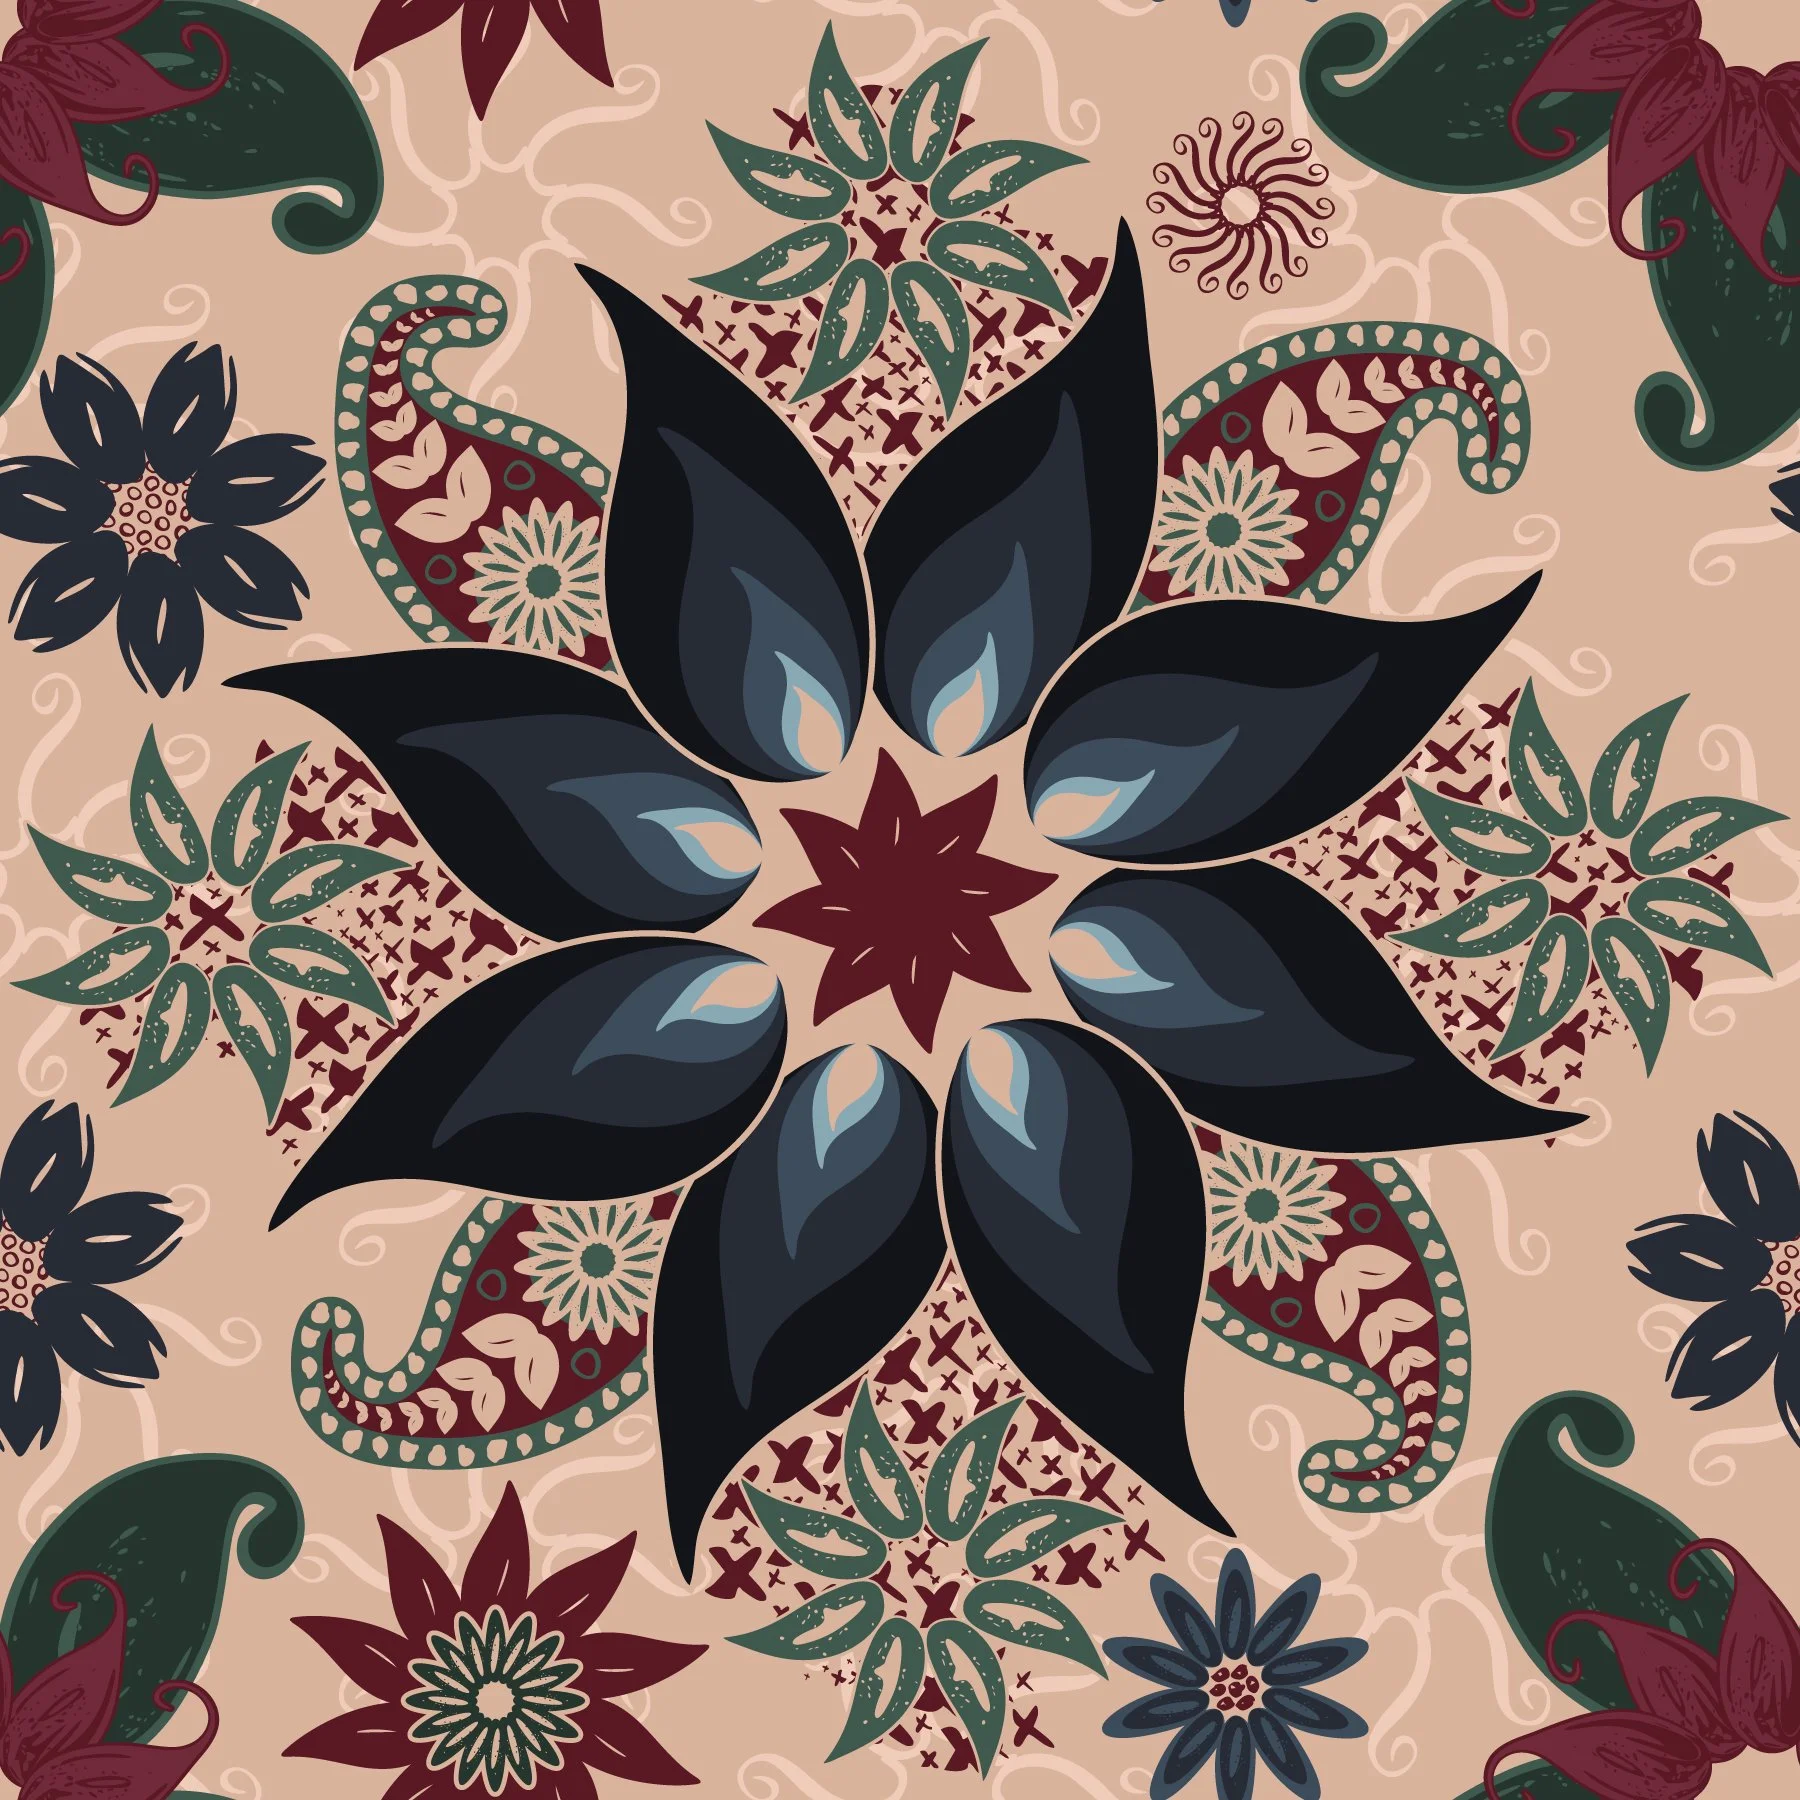
Final Pattern in Illustrator

Final pattern showing scale.
Challenge Results: For Spoonflower’s challenge I submitted a twelve inch version of this design. I thought that this version looked the best on mockups that people would look at for the challenge. I came in 953 out of 1567 (top 50%!) with 31 votes. I think this size looks best on products like tablecloths and pillows. I also designed a six inch version, which allows for greater detail for quilting projects. Check out Earthy Paisley Blooms and Stars (6 inch or 12 inch) on Spoonflower. Available in wallpaper, fabric, and home decor. Check out my full shop of designs here.

Pillow
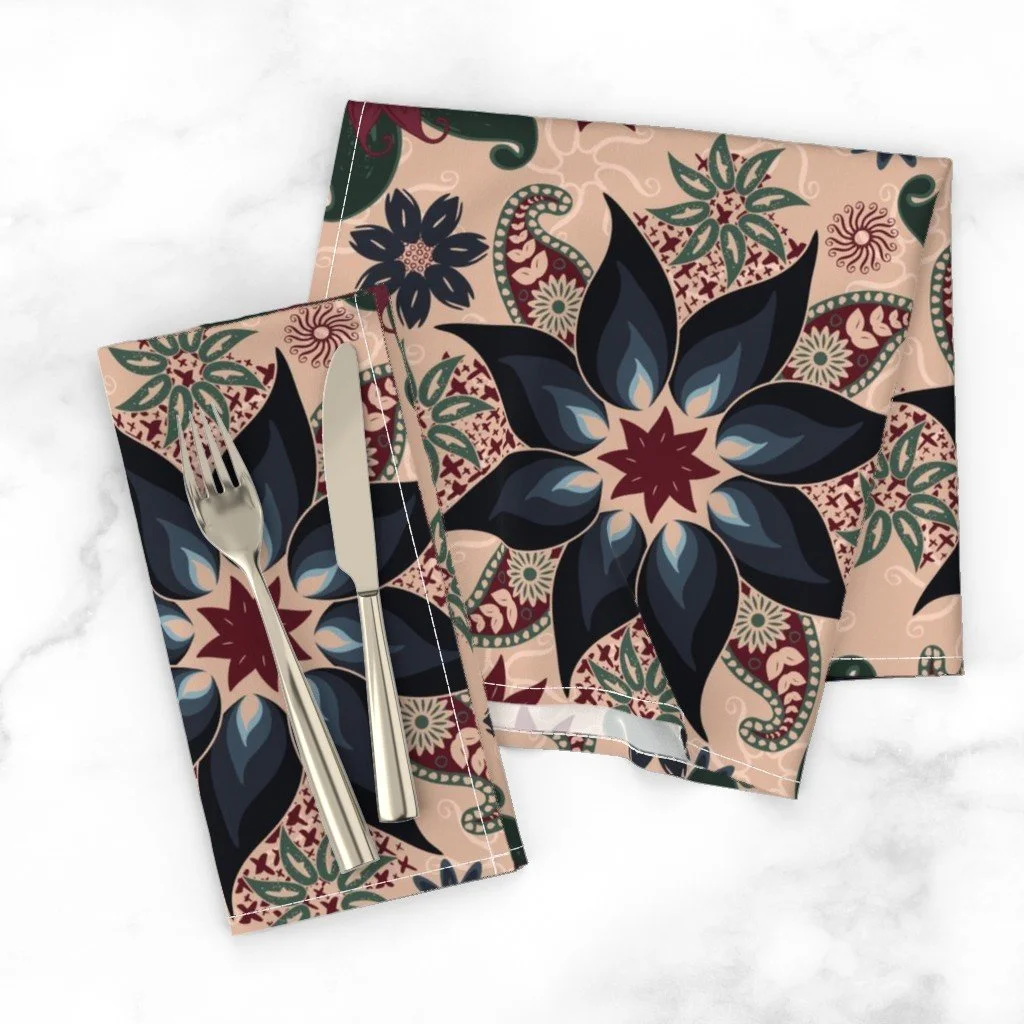
Napkins

Tablecloth
